
OpenStack is a fantastic open-source tool for creating, managing, and scaling cloud services. In this guide, I’ll show you how to set up OpenStack on your local machine and use it to deploy an e-commerce application (WooCommerce). By following these steps, you’ll gain hands-on experience with virtualization, networking, and cloud hosting.
What You’ll Learn
Here’s what you’ll pick up along the way:
- Setting up virtual machines.
- Installing and configuring OpenStack.
- Creating networks and managing IPs.
- Deploying a LAMP-based application.
Step 1: Understand the Setup
We are going to achieve our setup using 3 layers comprising of a physical layer, and two layers of virtualization as shown in Figure 1.
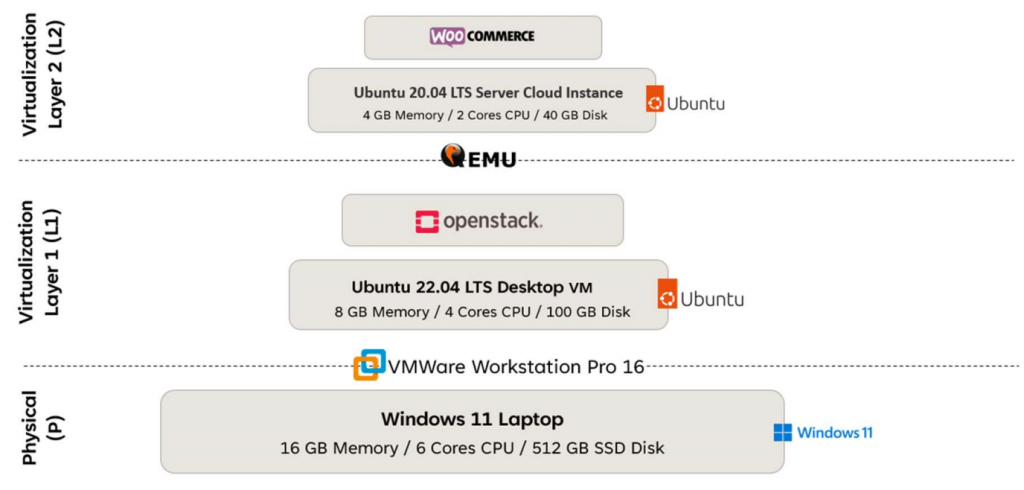
Before we start, let’s break it down:
- Physical Layer: This is your host machine. I used a Lenovo Legion Y530 with 16 GB RAM, a 512 GB SSD, and an Intel i7 CPU. The host machine runs on runs on Windows 11 Pro operating system.
- Virtualization Layer 1 (L1): This layer hosts OpenStack. It’s configured with 8 GB RAM, 100 GB storage, and 4 CPU cores. The L1 layer runs on Ubuntu 2.04.1 LTS Desktop.
- Virtualization Layer 2 (L2): This runs the e-commerce app inside OpenStack. The L2 layer runs on an Ubuntu 20.04 LTS Server Cloud Instance.
Step 2: Setup the Physical Layer
OpenStack requires Linux and works especially well with Ubuntu. To run Ubuntu as a guest operating system (OS) on a Windows host machine, we require a hypervisor. We will use VMWare Workstation Pro for this tutorial, but you may also use VirtualBox.
Step 3: Setup Virtualization Layer 1 (L1)
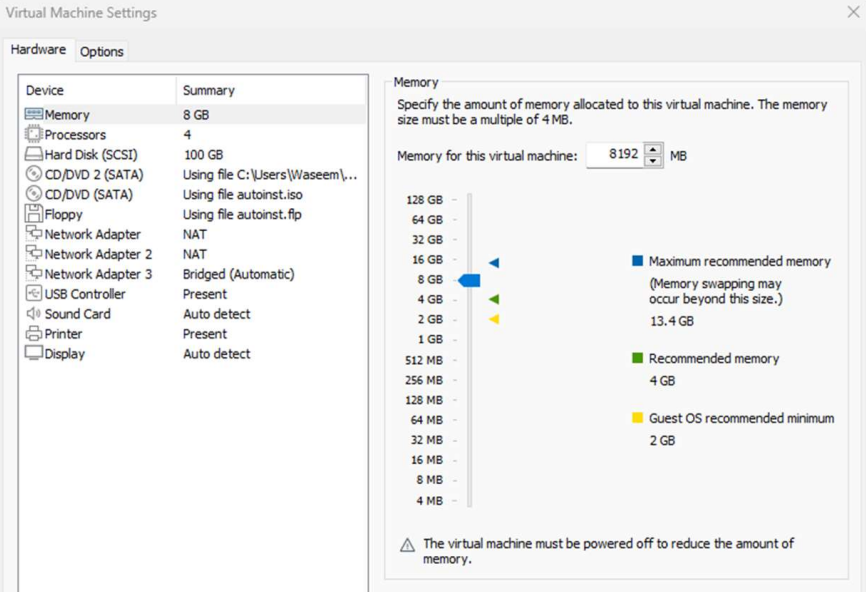
To ensure optimal performance, we allocated resources to the Virtual Machine (VM) as follows: 8 GB of RAM, 100 GB of SSD storage, and 4 CPU cores. These specifications are designed to support efficient operation and handle the expected workload effectively. The VM’s configuration details can be seen in Figure 2 for reference.
Step 4: Setting Up Network Adapters for the L1 VM
Here’s how we configured the L1 VM:
- Two NAT Adapters: These were set up to provide internet connectivity and assign specific IP ranges to the L1 VM.
- One Bridged Adapter: This connects the VM to the physical network, allowing it to share the same IP address as the host machine. This setup enables smooth communication between the VM and other devices on the network.
Step 5: Installing Ubuntu on L1 VM and Configuring a Static IP
Next, we powered on the L1 VM and followed the Ubuntu installation wizard. After completing the setup, we logged in using the username and password we had set earlier.
By default, the L1 VM gets a new IP address with every reboot because of DHCP. To fix this, we ensured the VM had a consistent IP for accessing OpenStack:
- We opened the Virtual Network Editor (VNE) in VMware (see Figure 3).
- In the NAT network settings, we assigned an easy-to-remember subnet IP.
- Then, we adjusted the DHCP range to
192.168.100.128 - 192.168.100.254, reserving192.168.100.100 - 192.168.100.127for static IPs.

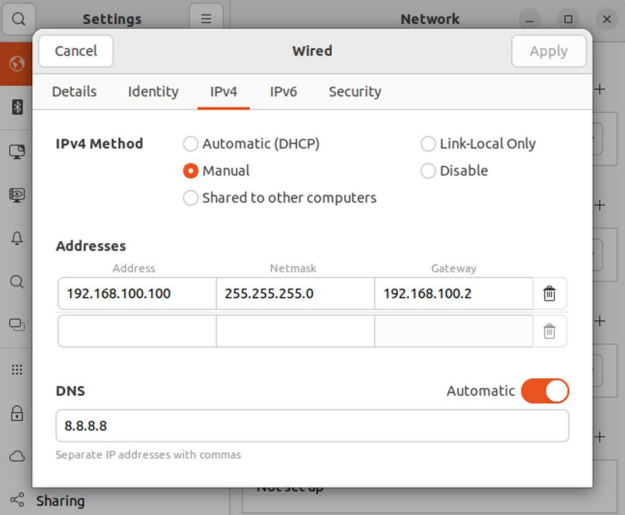
Finally, we used the Ubuntu interface to set a specific static IP for the L1 VM, ensuring consistent and reliable access to OpenStack. (See Figure 4)
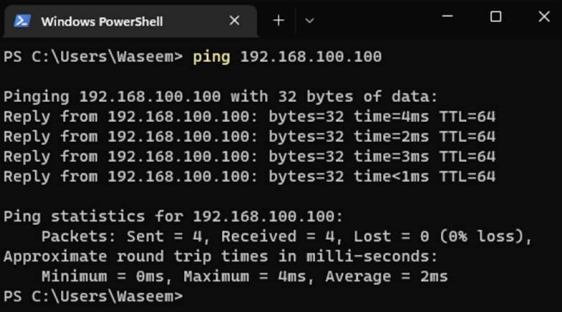
We can verify the networking setup by pinging the IP 192.168.100.100 from Windows 11. If the ping is successful, it confirms that the network configuration is correctly in place, as shown in Figure 5.
With this step, all the groundwork for installing OpenStack on the L1 VM is complete.
Step 6: Install OpenStack on L1 VM
Before installing OpenStack on the L1 VM, I suggest you do a quick recap on the OpenStack Architecture and how things work together.
Now, since we have an idea of the components of OpenStack, we can dive into the installation part. To quickly set up an OpenStack environment, we use DevStack, a collection of scripts designed for this purpose. Here’s the step-by-step process to install OpenStack Zed using DevStack:
Update the Ubuntu packages on the L1 VM using the following commands:
$ sudo apt -y update
$ sudo apt -y upgrade
Git is essential for downloading the latest OpenStack version. Install it using:
$ sudo apt-get install gitDevStack requires a non-root user with sudo capabilities:
$ sudo useradd -s /bin/bash -d /opt/stack -m stackThis creates a user named stack, with a home directory at /opt/stack and a bash login shell.
Grant execution permission to the stack user’s home directory:
$ sudo chmod +x /opt/stackAdd the stack user to the sudoers list for passwordless sudo access:
$ echo "stack ALL=(ALL) NOPASSWD: ALL" | sudo tee /etc/sudoers.d/stackSwitch to the stack user:
$ sudo -u stack -iClone the DevStack repository from the OpenDev platform:
$ git clone https://opendev.org/openstack/devstack
$ cd devstack
Before running the DevStack script, create a local.conf file to configure passwords. Use the following content for the file:
[[local|localrc]]
ADMIN_PASSWORD=Password123..
DATABASE_PASSWORD=$ADMIN_PASSWORD
RABBIT_PASSWORD=$ADMIN_PASSWORD
SERVICE_PASSWORD=$ADMIN_PASSWORD
Note: The password is intentionally weak since this is not a production setup.
Start the installation by executing the DevStack script:
$ ./stack.shThe installation process takes about 20-30 minutes. Once completed, the terminal will display URLs for services like Horizon, along with other OpenStack components as shown in Figure 6
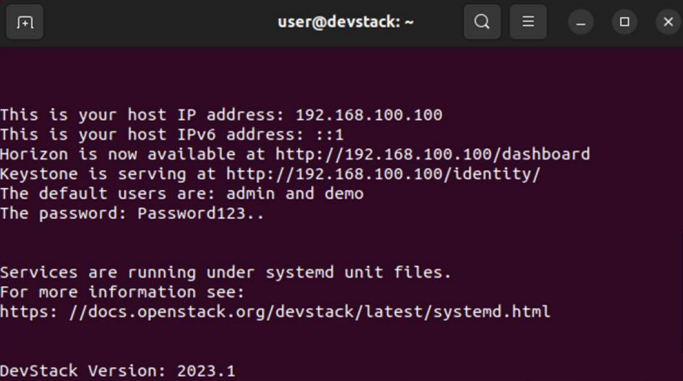
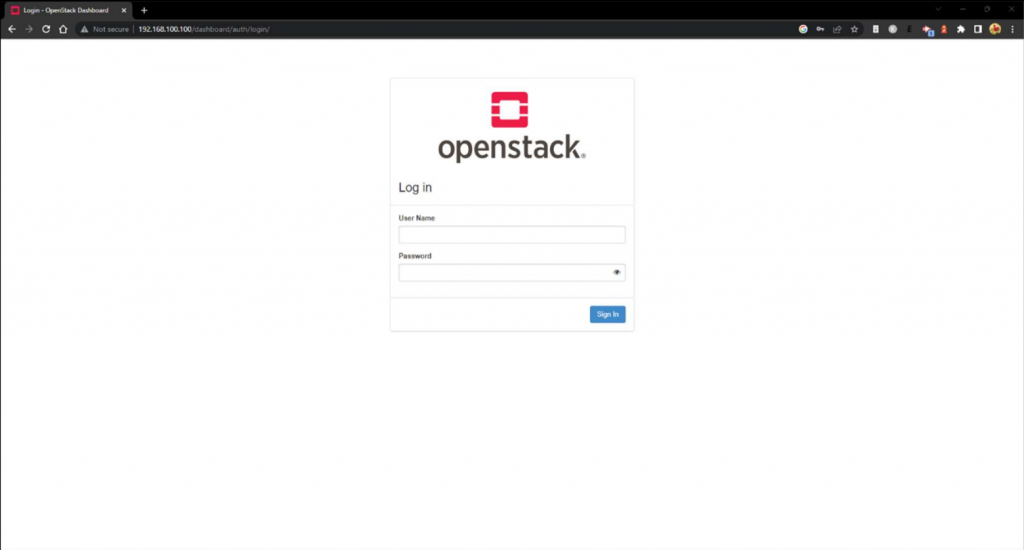
You can log in to the OpenStack Horizon dashboard through your web browser on the Windows host (see Figure 7). Use the address displayed in Figure 6 to access it.
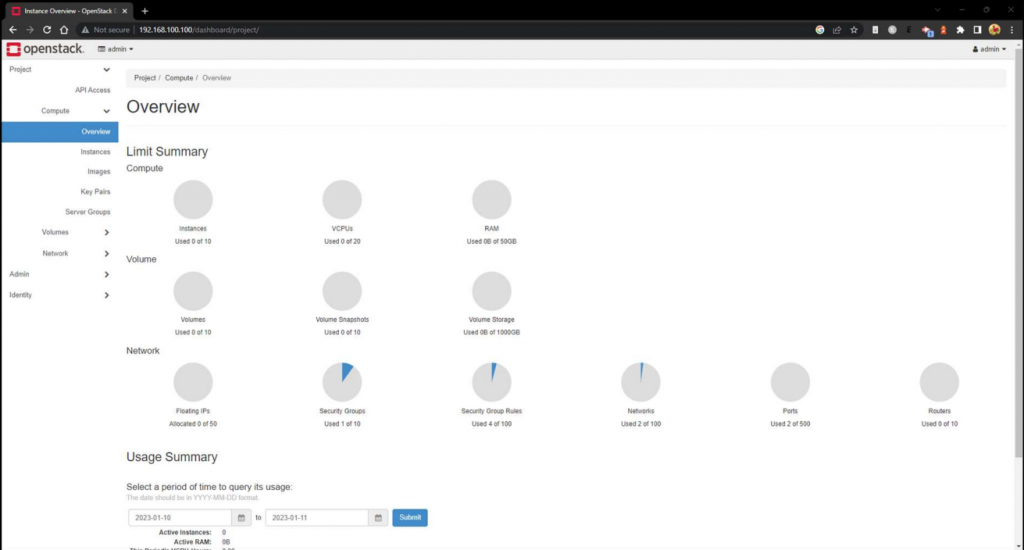
Once logged in, you will see the Horizon dashboard interface and an overview of the system resources managed by the current OpenStack Installation , as illustrated in Figure 8.
Step 7: Create Prerequisites for Instance Creation on OpenStack
To prepare for creating an instance to deploy the Ecommerce Application in OpenStack, follow these steps:
7.1 Create Users for the Project
- Project Admin (Admin Role): Responsible for managing the project.
- Project Member (Member Role): Responsible for creating instances and deploying the application.
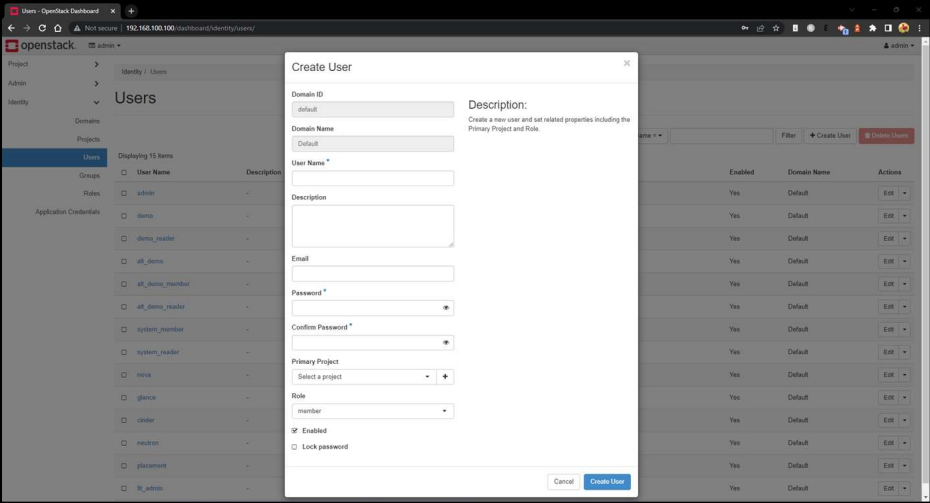
Users can be created as shown in Figure 9. The Admin user can then create additional users, like project members, and configure their roles.
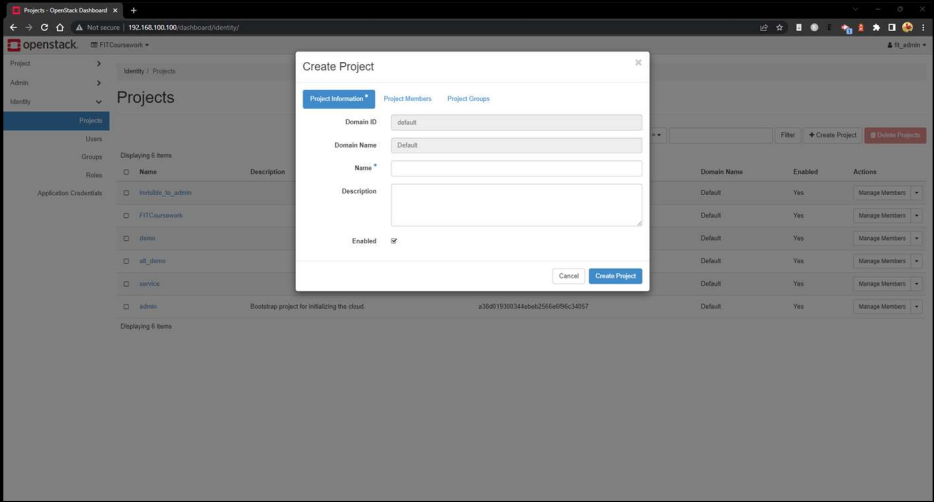
7.2 Create a Project
A project, part of Keystone, organizes resources in OpenStack.
- Use the Project Admin user to create a project (Figure 10).
- Add the previously created users to this project.
7.3 Create Networking Configurations (Neutron)
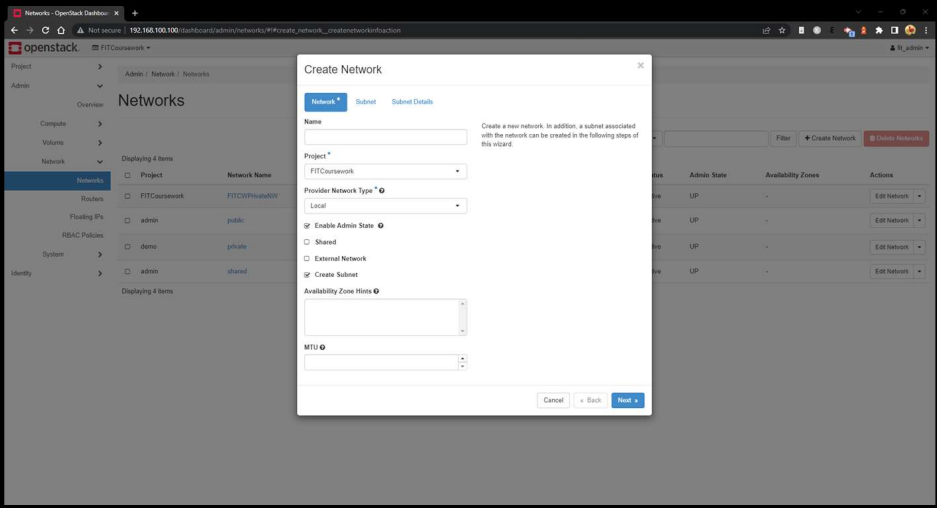
7.3. a. Private Network
A private network ensures secure and isolated communication for instances. Create it as shown in Figure 11:
- Set a network name.
- In the Subnet tab, provide a subnet name and manually enter the network address as
192.168.0.0/24. - Leave other fields as default.
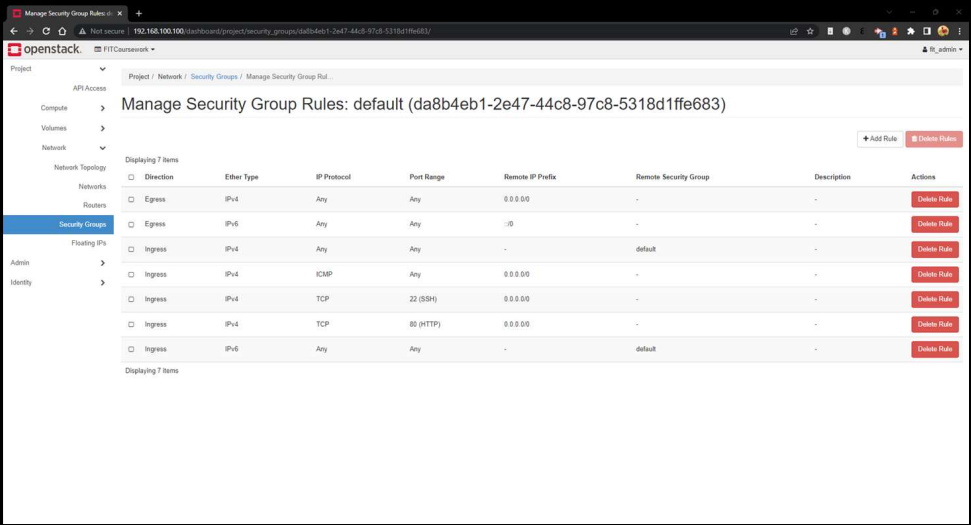
7.3. b. Security Group
A security group configures firewall rules to manage traffic. Modify the default security group by adding these ingress rules (Figure 12):
- Port 80 for HTTP
- Port 443 for HTTPS
- Port 22 for SSH
- ICMP for pinging the instance
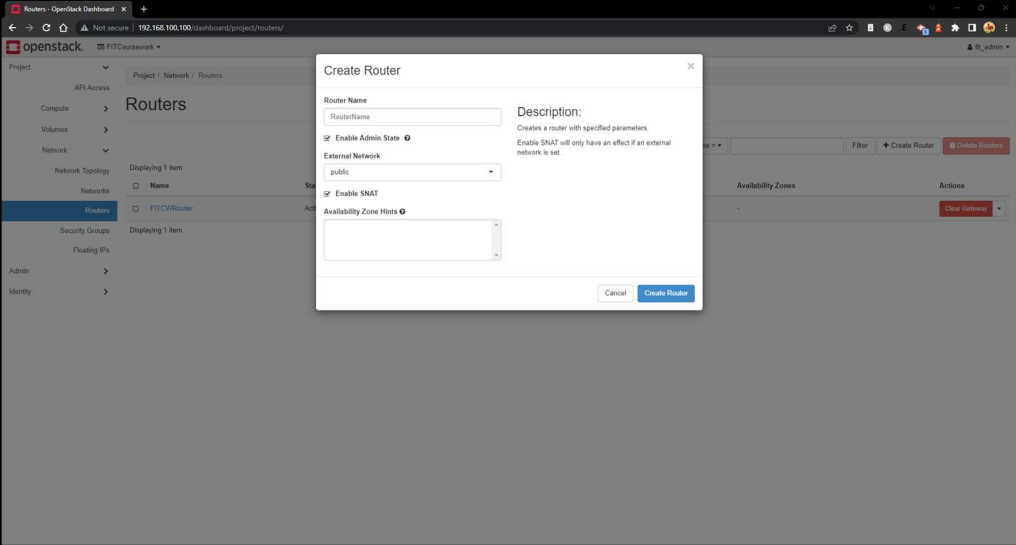
7.3. c. Router
Create a router to connect the private network to the public network, as shown in Figure 13.
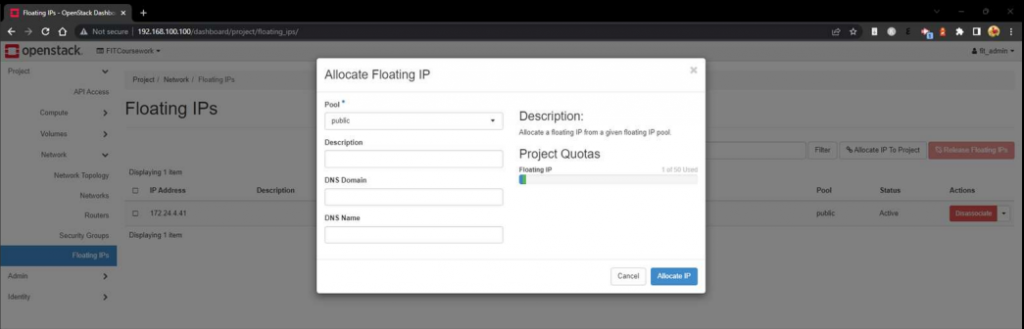
7.3. d. Floating IP
Assign a floating IP to provide a fixed IP for the instance. This allows inbound access from external networks without issues (Figure 14).
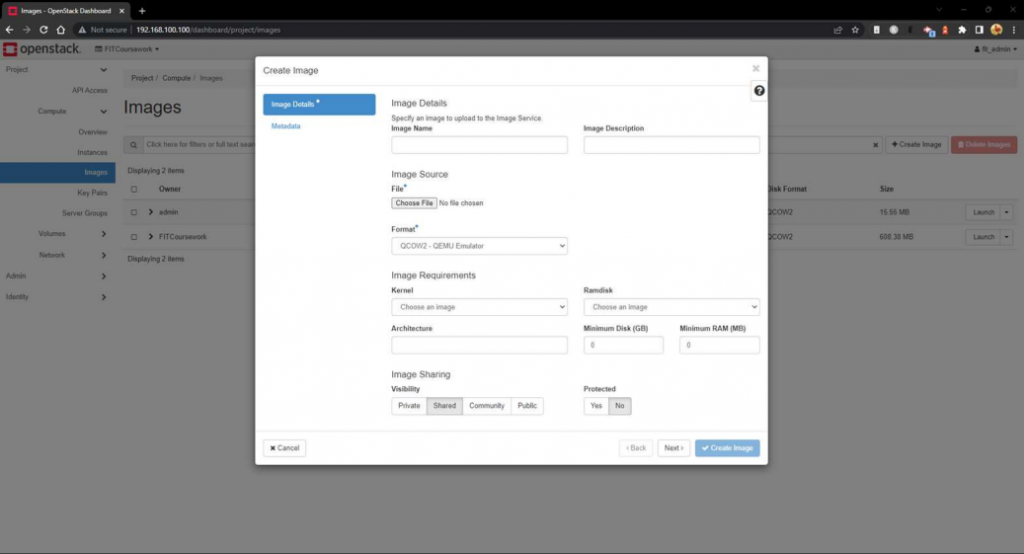
7.3. e. Image Creation (Glance)
Upload an operating system image. We used the Ubuntu Focal Cloud Image in QCOW2 format (Figure 15).
7.3. f. Key Pair
Add an SSH public key from the L1 Ubuntu VM. This is required for accessing Ubuntu cloud instances, as they do not have a default password.
These steps ensure the prerequisites for creating and deploying an OpenStack instance are met.
Step 8: Instance Launch in OpenStack
You can now launch an instance from the Compute section of the project by following these steps, as shown in Figure 16:
- Name the Instance: Provide a name for the instance in the Details tab.
- Select Image: In the Source tab, select the previously uploaded image (e.g., Ubuntu Focal Cloud Image).
- Choose Flavor: Select M1 Medium as the flavour, which includes: 4 GB RAM, 2 Cores, 40 GB Disk
- Assign Network: In the Networks tab, select the previously created Private Network.
- Set Security Group: Ensure the modified Default Security Group with the ingress rules is selected.
- Add Key Pair: In the Key Pair section, select the key pair you added earlier.
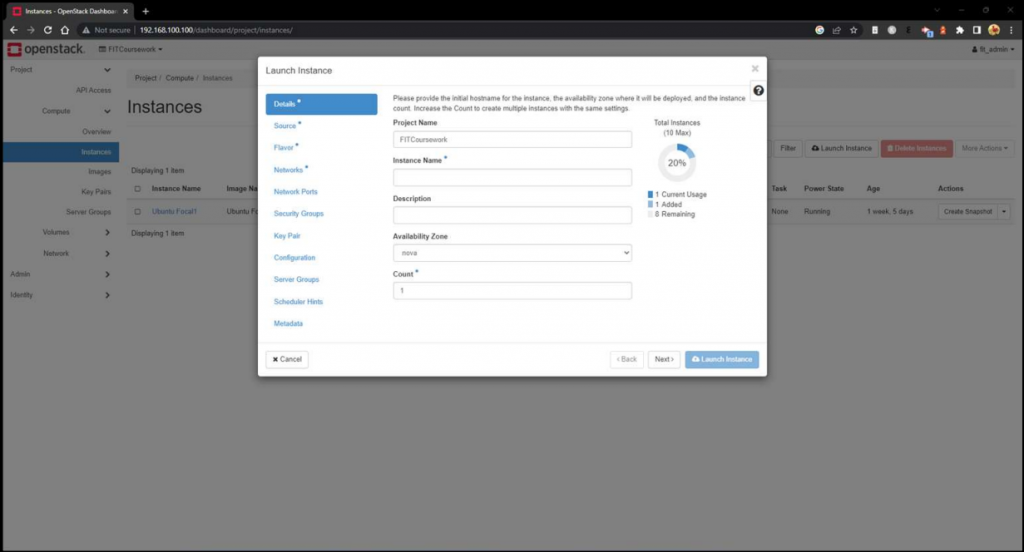
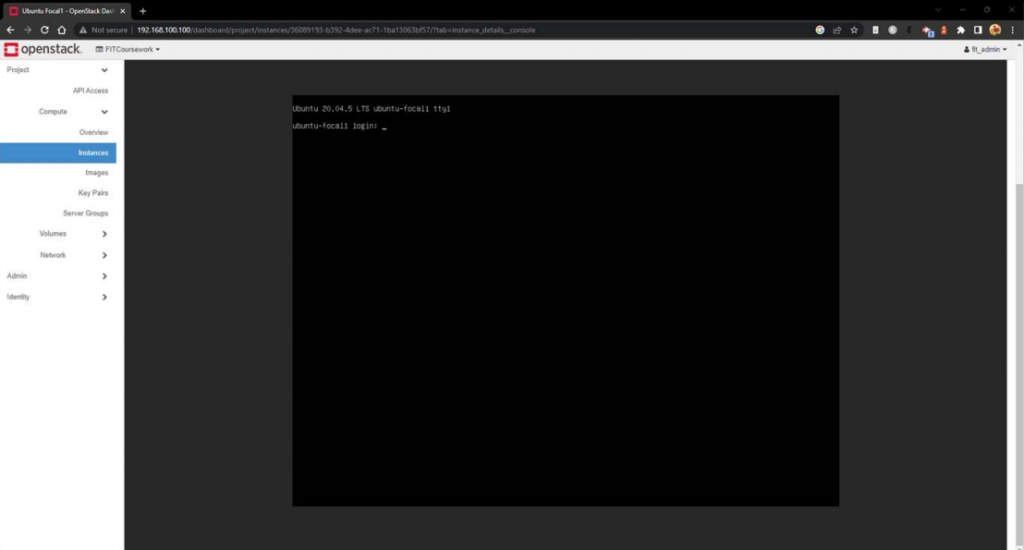
Once these steps are complete, launch the instance. You can access it via the Web Console, which will display a login prompt (Figure 17) once the instance is ready. This process typically takes 5-10 minutes.
Step 9: Networking Configuration for L2 VM
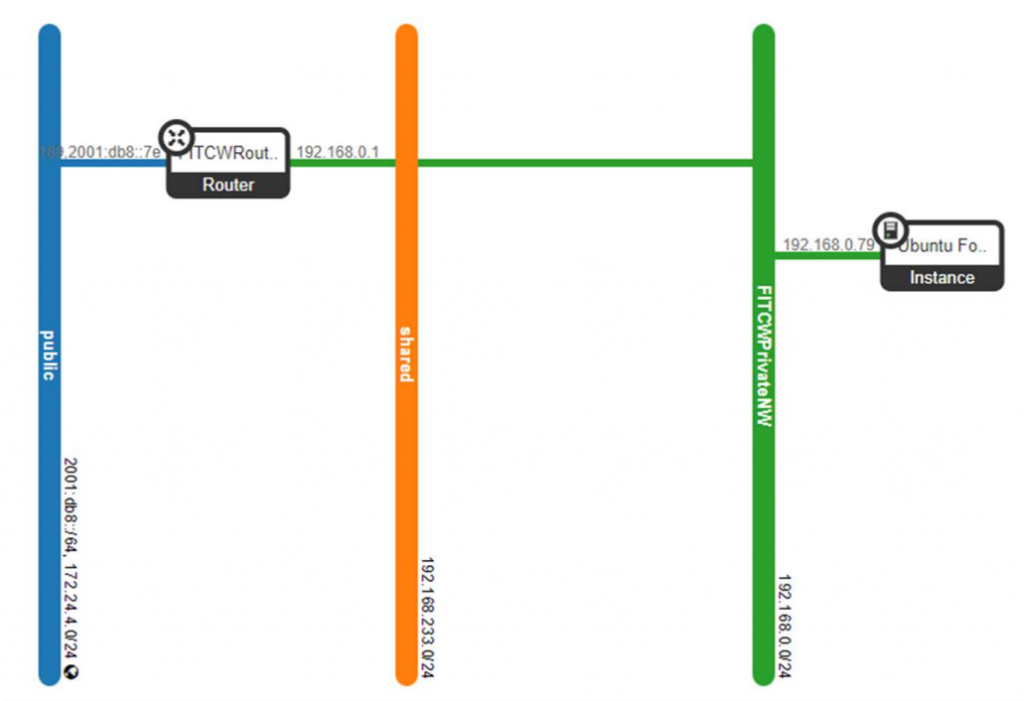
9.1 Associating a Floating IP with the L2 Instance
Navigate to the Instance Dropdown menu. Select the option to Associate Floating IP. Assign the floating IP address 172.24.4.41 to the instance. After this step, the network topology will update to reflect the changes, as shown in Figure 18. This floating IP allows external access to the L2 instance.
9.2 Add SSH Keys
The L2 VM is now running and can be accessed via SSH from the L1 VM using the private key associated with the instance. To enable access from the Windows 11 physical machine, add its SSH public key to the ~/.ssh/authorized_keys file on the L2 VM. Additionally, update the ~/.ssh/known_hosts file on the L2 VM by adding the L1 VM’s public key to ensure secure access and prevent host authenticity warnings.
9.3
Enable IP forwarding:
sudo sysctl net.ipv4.ip_forward=1Set up NAT rules to forward L1 ports to L2 ports:
sudo iptables -t nat -A PREROUTING -p tcp --dport 2222 -j DNAT --to-destination 172.24.4.41:22
sudo iptables -t nat -A PREROUTING -p tcp --dport 8080 -j DNAT --to-destination 172.24.4.41:80
sudo iptables -t nat -A PREROUTING -p tcp --dport 4343 -j DNAT --to-destination 172.24.4.41:443
These rules forward incoming traffic on L1 ports 2222, 8080, and 4343 to the L2 VM ports 22 (SSH), 80 (HTTP), and 443 (HTTPS) respectively. The chosen L1 ports avoid conflicts with other services.
To enable access from the Windows P laptop network, you need to configure similar rules on the Windows system. After setting up, you can SSH into the L2 VM from the P layer. Make sure to upgrade the necessary packages in the L1 VM as done in the previous steps.
Step 10: Install WooCommerce
Now that the server is accessible via SSH and browser, you can install WooCommerce by following these two steps:
Install WordPress on Ubuntu: Use the tutorial from DigitalOcean to set up WordPress on your server
Install WooCommerce: After setting up WordPress, follow the WooCommerce guide to install the WooCommerce plugin
Final Words
Congratulations! You’ve set up OpenStack, deployed an instance, and hosted an e-commerce app. While this was a local setup, the skills you learned here can scale to larger, production-level systems. Keep experimenting with OpenStack and discover its full potential.
Ready to go bigger? Try deploying OpenStack on a dedicated server for better performance and scalability